Read through the blog entries, menu-accessible pages and archives if you're interested! Welcome to Peter and Maureen's website.
 My Facebook Page
 Follow me on Twitter
 Join my network
Pete's Online CV
Archive for the ‘General’ Category
 Home Control over the Internet Part 2
If you’re read my previous article – you’ll know I’m interested in home control DIY. The original home control article is here.
 My first attempts at remote control over here in Spain are coming together. Having had remote access to cameras for 3 or 4 years now with reasonable reliability, I’m ready to extend this to temperature and humidity monitoring and remote control of lighting.
If you look at my previous articles on home control you’ll know that I’m using NETIO on Android phones, via WEBSOCKET drivers on Arduino-type boards using the WIZ Internet controller at the master end and low-cost RF24NETWORK-driven radio-controlled boards for remotes.
I recently had some boards made to comprise the Atmel 328 chip and associated components along with monitoring LEDS and the NRF24L01 low-cost radio boards as daughter-boards. Here is the first of the units, in a case top – alongside a single RELAY board. This board needs USB power only (pretty standard low cost plug-in-the-wall power) and communicates with the master (and hence the remote Android or iPhone) to allow monitoring and control.
The board you see here also has a DHT11 unit attached to provide temperature and humidity readings. These are not stunningly accurate but I have calibration offsets available in EEPROM on the controller to compensate.
The plan is to leave the main board attached to the router here and the small control board will monitor downstairs temperature and humidity – if time permits a second board will monitor the same upstairs – as humidity is an issue in caves – even modern ones such as ours – too wet and clearly this causes damp issues, too dry and the underlying cave material gets brittle and you get bits dropping off! Breezeblock is so much easier but then also so much more ugly.
More on this later, the basic boards are working a treat, I’ve yet to do range testing for the radio.
This all sprang up from my original article on a cottage thermostat in which I envisaged a very simple controller. Then came the UberBareBoard article about an Atmega328-based Arduino clone, initial attempts to master the NRF24L01 radio. The next article was the first item entitled home control and after this – the winter update.
Packaging
A company offering free samples of components just sent me 4 items.. very nice of them too. But look at the packaging (which meant they had to leave the stuff with the neighbours).


Home Control over the Internet
Updated July 5, 2013
This article is about a practical home control system for the enthusiast and is being updated as new developments come along. Combining extremely low cost radio and inexpensive Ethernet, the system allows for mobile phone or tablet access to a range of items including lamp control (on/off/fade), temperature monitoring (and thermostatic control and general analog inputs)… and this is just the beginning:
 Recently I’ve turned to working with what are called “Arduino” chips and boards – actually the only “Arduino” bit I use is their boot loader routine – the boards I use are usually ATMEL chips on boards I’ve designed (or kluged)… the chip is a simple microcontroller (not powerful enough to call a “Microprocessor” but a hell of a lot nicer than the PIC chips we used a decade ago.
The Atmel chips are fun devices that are (relatively) easy to use and there are several boards available cheaply, mainly from China or Chinese companies in the UK that make this whole control thing worth looking at again. More’s the point there are lots of libraries – some working, some part working out there to save re-inventing the wheel.
The big issue for me has always been the wires. Much better to control stuff via, say, a mobile phone and have the units work by radio… but it has to be CHEAP to be worthwhile.
That is the basis of the project I’m working on right now. On the left you’ll see the first experimental screen of my Samsung S4 project (though it works seamlessly on any Android or iPhone-type device such as a tablet). For the purpose of experimentation, this screen is showing local 4 on/off type controls, 5 remote station on-off/off controls 4 remote on-off controls, time (from the base unit), temperature monitors from the base unit (internal/external) and temperature and humidity from a small unit at the end of the radio chain… but that’s just the start.
Note (July 5 2013) – I’ve made a decision, rather than continue to struggle with space on the master unit – and in order to use the same final circuit board on the master as will be used on the slaves – to eliminate IO control on the master – hence freeing up space. The master unit will concern itself with handling communication with the slaves, talking to the Internet and handling thermostatic calculations. After much thought this is the better way to go rather than having special cases all over the place for “local” controls. I did look at the MEGA boards with lots of extra room – but it makes sense to use one low cost board for everything – pointless jacking the price onwards and upwards.
The mobile DISPLAY is made possible by software which costs a pound or so called NETIO and is available for Android and iOS. It is a customisable App that works on the phone complete with web tools to develop such panels without programming as such.
 Essentially, the panel works by sending simple commands from the phone over WIFI or 3G to a web server running what is referred to as a WEB SOCKET – i.e. the basic underlying mechanism behind a web page but without all the extras – after all we’re talking simple commands here – it just needs to be very reliable.
And what and where is the “socket server”? It is software running on an Atmel chip of course – but the server is relatively simple (it’s actually complicated but we don’t need to know that as we just use a freely available library accepting commands and returning text responses). The rest of the code on the Arduino concerns itself with checking temperatures and firing off remote commands by radio to other boards. The App merely puts the end-user gloss on it. The radio is based on something I’ve written about before – RF24NETWORK which never worked properly in the past due to a minor issue in the underlying radio library and my own incompetence in not putting a smoothing capacitor on the radio board. But that’s all covered elsewhere.
Currently I have a board sitting on my bench talking to the App on my phone, over the Internet. On the top right you’ll see an image – I’m using a standard board for the purpose of experimenting – an Arduino Uno board at the back with an Ethernet “shield” sitting on top of it – together with a couple of test-wired Dallas 3-pin temperature-reading chips that look like simple transistors and actually only need 2 wires to work (but I’m using 3). In the foreground is a twin relay board of the type I’m using to control things such as lights or heating system thermostat replacement. I could just as easily use opto-coupled triacs. Note that the final unit has no wiring for LOCAL controls – these are all handled on the slave radio units.
In addition, there was enough room in the master board software to call an Internet TIME service and that keeps the local clock accurate – and also sends the time in the 4-byte time_t format to the slaves. As these have the real time clock software in them – they can be updated automatically by incoming packages – and hence use the time for whatever purpose…. providing time displays on household gadgets etc… one example – I have a SAD light in the bedroom which runs on a software clock only which in time becomes inaccurate – with the simple addition of the radio network and a little software, this when upgraded will keep perfect time.
 Note the yellow Internet lead and underneath (top picture) , a simple plug-in the wall power supply (5v) feeds the lot.
This is only for the purpose of testing and the hardware above probably comes to £30 – but an Arduino clone can be had for as little as £6 or so, while the “Ethernet shield” can be purchased from Ebay for maybe £13.
So you can see it is possible to put together something for very little money. I have looked at the cheaper ENC boards but they use up a considerable amount of RAM memory and hence any savings there would mean moving to a larger processor – defeating the object.
 The radio unit at the end of the chain shown below right costs excluding case and USB power less than a tenner. That board is the one supplying temperature and humidity readings in the top display. The blue item underneath is the temperature sensor.
The second screen on the right above is merely a test page showing 6 local slider controls and analog inputs from 5 boards – the last one being located way down the radio network chain at the other side of the house.
 So that gives us one card controlled by the Internet. How does that make a home control? The next stage is to have that card also talk to a wireless controller – to talk to other boards. The cost of wireless is similarly inexpensive but very limited.
The NRF boards will typically talk DIRECTLY to 5 other boards (they CAN talk to more but typical libraries out there limit themselves to 5) over the kind of range you’ll see for cheap home WIFI – i.e. not very far and definitely not through more than a couple of walls – what’s needed is a means to network them – and that’s where the software library RF24NETWORK comes in – a simple means to network dozens of these together. It may be in this case that the network is not needed – the fact that the main unit can talk to 5 other radio boards may well be sufficient and if not then simply relaying software from one to the next takes that up to 25 boards and way beyond.
The NETio designer is in touch and has been helpful. Next step is to fully test it on the really cheap Ethernet boards (done that but not yet happy about potential memory leaks). I’ve already had success with the radio boards and the rest is easy. Here are a couple of early blogs on the subject of the radio network… and with links to other resources.
Current prototypes feature:
2 12-bit analog inputs (had 4 but needed pins 0 and 1 to check serially…)
4 digital outputs
3 analog PWM outputs (ideal for LED LIGHTING by adding a MOSFET and 12v supply for the lighting – again a plug in the wall job)
2 DHT11/22 chip temperature inputs (I have implemented both humidity and temperature – could have used Dallas chips for temperature but this seemed like 2 for 1).
You can add as many radio boards as you need and each one has the same facility.
The THIRD screen (left, above) is the thermostat control page – I’ve added the ability to control a single remote relay as the thermostat chip - with the kind of control (heat delay etc) you’d expect from a Thermostat.
Alongside this I’ve asked the NETio designers if they will consider implementing MQTT – as this adds security – we already have MQTT working on the ENC boards thanks to a Saturday session with friend Jonathan Farmer and a lot of follow up work. For now my security consists of sending a special character string to allow access to other functions – that times out after 60 seconds unless refreshed by the App. Hey – it works!

Currently I have enough memory to do the job using the WIZ network card (hence saving RAM)… and ROM I’m up to 27out of 30.7k available.
The way this works (and I have a working setup on my desk)…. the units responds to commands such as x/OUT1=1 or x/OUT1=0 where x is the unit number in octal (base 8 – hence 0 1 2 3 4 5 6 7 10 11 12 etc)
 The word OUT1 on it’s own returns the status of that output – and so on. So 2/OUT1=1 would turn on output 2 on the radio slave “2” for example. In the picture above, lets say the radio board that has a blue arrow to it’s right is radio 2. To handle relaying of these short range radios, that radio can talk to radio “22” as well as 4 other siblings. – radio “22” can talk to 5 siblings – “122” through “522” etc., the further down the chain the more you add on the LEFT of the address. So 522/OUT1=1 would turn on the smallest board on the right, picture above, the 5th one.
So – at level 1 the base can talk to 5 units… next level in it can talk to 5+(5*5) = 30 units. At the next level 5+(5*5)+(5*5*5)=155 units – next level out increases dramatically to 780 units – ANY unit can talk to any other but the parents MUST be turned on (hey what do you want for a few pounds)… I think 4 levels (780 units) is likely sufficient (and polling such a large number would likely be impractical but it does give you a good hopping range given the limitations of the cheap radios) and in my prototype setup I can run a slider on the phone and vary the brightness of a LED on the farthest unit virtually in real time with only a tiny, fractional second delay.
 For an absolute minimal slave board you just need the radio and one of the small surface mount Arduino clones such as the one shown on the left here. We’re looking at no more than £6 plus power (5v – i.e. any old USB plug-in-the-wall supply available for less than £3) – this needs something like a relay to drive a lamp or heating – and that’s it – clearly if you want more – add more. That whole board is the size of my thumb!
And that’s it – the first fruits of this work will be to put temperature monitors and light/heat control in our rental cottage and our place in Spain so I have access to this and other information on the phone. Implementing a movement counter with a simple infra-red is another idea etc.… I need some boards first as right now this is all a bit too spaghetti. These are on the way.
Features include the ability to store in EPROM, settable remotely, the unit number from which to get the temperature for thermostatic control – and the unit which you need to talk to in order to turn the heat on by a relay. I’ve also clarified my worst fear – RF24NETWORK cannot handle sending out one communication after another while expecting to READ communications… so I’ve arranged that data is only initiated by unit 0 – which then always expects a response back. I’ve arranged a timeout for 0.2 seconds for expected data return before sending the next package out – obviously cancelling that delay when something comes in – with that in place and only with that in place I’m getting 99% reliability out of the radio packages. I’ve just added multiple retries (rarely needed) and with that I seem to be getting 100%.
Relay outputs by default are HIGH as most of the relays out there demand a pull DOWN to turn the relay on…!! There is the ability in the software to invert this.
And now a little history – you can stop reading now if you’re not interested but this might help to understand how I got this far… Once upon a time in the 90s, my business partner (of the time) and I developed a home control project called Appcon which consisted of a small board with various sensors and outputs – a triac (solid-state relay) to control, say lighting or heating, a temperature sensor, a general input and a speaker output. Click these pictures to see larger versions.
 This small board ran from 12 volts and connected to other boards via a 4-core telephone wire. at one end of the wire was a PC firing out commands, reading data and generally controlling the whole thing with a set of rules.
 It was developed on the original Windows 3.1 before the time of widely available Internet and LONG before we could buy cheap stuff from China.
This worked well, in my house in Newcastle I had around 40 of these cigarette-pack sized boards controlling just about everything from heating, lighting, burglar alarm, putting out “cricket” sounds in the garden, you name it.
The problem in developing this was the nature of construction – the fact that the boards had to be wired together was a real issue. In some homes it’s just not that easy to put a wire all over the place to connect everything together. It certainly is not in my stone-walled country cottage today.. I’d get shot!
The interface was good but as Windows matured it rapidly started to date and there was no such thing as a mobile phone interface! Today you would not think of using this (well, I wouldn’t!)
That product was GREAT fun and we sold quite a lot of them, but at the end of the day, home control remained a minority sport and we never did get this into the B&Qs of this world. Meanwhile, particularly in the UK, what’s out there remains expensive. Not too many people want to shell out £30-50 just to turn a light on and off!
Home Control over the Internet
Updated June 29, 2013
This article is about a practical home control system for the enthusiast and is being updated as new developments come along. Combining extremely low cost radio and inexpensive Ethernet, the system allows for mobile phone or tablet access to a range of items including lamp control, temperature monitoring (and thermostatic control and general analog inputs)… and this is just the beginning:
 Recently I’ve turned to working with what are called “Arduino” chips and boards – actually the only “Arduino” bit I use is their boot loader routine – the boards I use are usually ATMEL chips on boards I’ve designed (or kluged)… the chip is a simple microcontroller (not powerful enough to call a “Microprocessor” but a hell of a lot nicer than the PIC chips we used a decade ago.
The Atmel chips are fun devices that are (relatively) easy to use and there are several boards available cheaply, mainly from China or Chinese companies in the UK that make this whole control thing worth looking at again. More’s the point there are lots of libraries – some working, some part working out there to save re-inventing the wheel.
The big issue for me has always been the wires. Much better to control stuff via, say, a mobile phone and have the units work by radio… but it has to be CHEAP to be worthwhile.
That is the basis of the project I’m working on right now. On the left you’ll see the first experimental screen of my Samsung S4 project (though it works seamlessly on any Android or iPhone-type device such as a tablet). For the purpose of experimentation, this screen is showing local 4 on/off type controls, 5 remote station on-off/off controls 4 remote on-off controls, time (from the base unit), temperature monitors from the base unit (internal/external) and temperature and humidity from a small unit at the end of the radio chain… but that’s just the start.
Note (June 23) – I’ve made a decision, rather than continue to struggle with space on the master unit – and in order to use the same final circuit board on the master as will be used on the slaves – to eliminate IO control on the master – hence freeing up plenty of space. The master unit will concern itself with handling keepalive signals from the slaves, talking to the Internet and handling thermostatic calculations. After much thought this is the better way to go rather than having special cases all over the place for “local” controls.
The DISPLAY is made possible by software which costs a pound or so called NETIO and is available for Android and iOS. It is a customisable App that works on the phone complete with web tools to develop such panels without programming as such.
 Essentially, the panel works by sending simple commands from the phone over WIFI or 3G to a web server running what is referred to as a WEB SOCKET – i.e. the basic underlying mechanism behind a web page but without all the extras – after all we’re talking simple commands here – it just needs to be very reliable.
And what and where is the “socket server”? It is software running on an Atmel chip of course – but the server is relatively simple (it’s actually complicated but we don’t need to know that as we just use a freely available library accepting commands and returning text responses). The rest of the code on the Arduino concerns itself with checking temperatures and firing off remote commands by radio to other boards. The App merely puts the end-user gloss on it. The radio is based on something I’ve written about before – RF24NETWORK which never worked properly in the past due to a minor issue in the underlying radio library and my own incompetence in not putting a smoothing capacitor on the radio board. But that’s all covered elsewhere.
Currently I have a board sitting on my bench talking to the App on my phone, over the Internet. On the top right you’ll see an image – I’m using a standard board for the purpose of experimenting – an Arduino Uno board at the back with an Ethernet “shield” sitting on top of it – together with a couple of test-wired Dallas 3-pin temperature-reading chips that look like simple transistors and actually only need 2 wires to work (but I’m using 3). In the foreground is a twin relay board of the type I’m using to control things such as lights or heating system thermostat replacement. I could just as easily use opto-coupled triacs. Note that the final unit has no wiring for LOCAL controls – these are all handled on the slave radio units.
In addition, there was enough room in the master board software to call an Internet TIME service and that keeps the local clock accurate – and also sends the time in the 4-byte time_t format to the slaves. As these have the real time clock software in them – they can be updated automatically by incoming packages – and hence use the time for whatever purpose…. providing time displays on household gadgets etc… one example – I have a SAD light in the bedroom which runs on a software clock only which in time becomes inaccurate – with the simple addition of the radio network and a little software, this when upgraded will keep perfect time.
Note the yellow Internet lead and underneath (top picture) , a simple plug-in the wall power supply (5v) feeds the lot.
This is only for the purpose of testing and the hardware above probably comes to £30 – but an Arduino clone can be had for as little as £4 or so, while the “Ethernet shield” will hopefully be replaced by a cheaper Ethernet board which can cost barely more than £4. Currently the one I’m using is around £12 – but this is only needed on your main board! The slave boards are even more inexpensive as all they need is a radio card – and so you can see it is possible to put together something for very little money.
The radio unit at the end of the chain shown below right costs excluding case and USB power less than a tenner. That board is the one supplying temperature and humidity readings in the top display. The blue item underneath is the sensor – it is pointless putting it inside the case as any residual heat no matter how little in the circuitry will affect readings.
The cheap ENC network cards are not as easy to use for “web sockets” because a lot more is left to the  software (that’s why they are cheaper) and socket implementations to date have been few and far between but thanks to work by Peter Oakes in Canada who’s been helping me with this, it looks like the ENC board is cracked all but for a question of reliability – we have a working socket implementation using code originally written for the Nanode boards. Right now it falls over occasionally so I’m leaving it to one side while I get the rest perfected.
The second screen on the right above is merely a test page showing 6 local slider controls and analog inputs from 5 boards – the last one being located way down the radio network chain at the other side of the house.
 So that gives us one card controlled by the Internet. How does that make a home control? The next stage is to have that card also talk to a wireless controller – to talk to other boards. The cost of wireless is similarly inexpensive but very limited.
The NRF boards will typically talk DIRECTLY to 5 other boards (they CAN talk to more but typical libraries out there limit themselves to 5) over the kind of range you’ll see for cheap home WIFI – i.e. not very far and definitely not through more than a couple of walls – what’s needed is a means to network them – and that’s where the software library RF24NETWORK comes in – a simple means to network dozens of these together. It may be in this case that the network is not needed – the fact that the main unit can talk to 5 other radio boards may well be sufficient and if not then simply relaying software from one to the next takes that up to 25 boards and way beyond.
The NETio designer is in touch and has been helpful. Next step is to fully test it on the really cheap Ethernet boards (done that but not yet happy about potential memory leaks). I’ve already had success with the radio boards and the rest is easy. Here are a couple of early blogs on the subject of the radio network… and with links to other resources.
Current prototypes feature:
2 12-bit analog inputs (had 4 but needed pins 0 and 1 to check serially…)
3 digital outputs
3 analog PWM outputs (ideal for LED LIGHTING by adding a MOSFET and 12v supply for the lighting – again a plug in the wall job)
2 DHT11/22 chip temperature inputs (I have implemented both humidity and temperature – could have used Dallas chips for temperature but this seemed like 2 for 1).
You can add as many radio boards as you need and each one has the same facility.
The THIRD screen (left, above) is the thermostat control page – I’ve added the ability to control a single remote relay as the thermostat chip - with the kind of control (heat delay etc) you’d expect from a Thermostat.
Alongside this I’ve asked the NETio designers if they will consider implementing MQTT – as this adds security – we already have MQTT working on the ENC boards thanks to a Saturday session with friend Jonathan Farmer and a lot of follow up work. For now my security consists of sending a special character string to allow access to other functions – that times out after 60 seconds unless refreshed by the App. Hey – it works!

NOTE IN THE CURRENT WORK I’ve SCRAPPED IO shown on the master unit – I was determined to stick with the 328 and I was running out of both RAM and ROM. Currently I have enough memory to do the job using the WIZ network card (hence saving RAM)… and ROM I’m up to 26.6k out of 30k available.
The way this works (and I have a working setup on my desk)…. the units responds to commands such as x/OUT1=1 or x/OUT1=0 where x is the unit number in octal (base 8 – hence 0 1 2 3 4 5 6 7 10 11 12 etc)
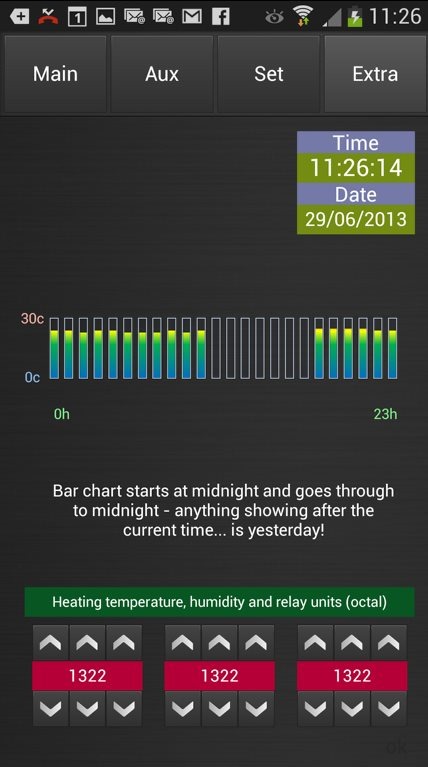 The word OUT1 on it’s own returns the status of that output – and so on. So 2/OUT1=1 would turn on output 2 on the radio slave “2” for example. In the picture above, lets say the radio board that has a blue arrow to it’s right is radio 2. To handle relaying of these short range radios, that radio can talk to radio “22” as well as 4 other siblings. – radio “22” can talk to 5 siblings – “122” through “522” etc., the further down the chain the more you add on the LEFT of the address. So 522/OUT1=1 would turn on the smallest board on the right, picture above, the 5th one.
So – at level 1 the base can talk to 5 units… next level in it can talk to 5+(5*5) = 30 units. At the next level 5+(5*5)+(5*5*5)=155 units – next level out increases dramatically to 780 units – ANY unit can talk to any other but the parents MUST be turned on (hey what do you want for a few pounds)… I think 4 levels (780 units) is likely sufficient (and polling such a large number would likely be impractical but it does give you a good hopping range given the limitations of the cheap radios) and in my prototype setup I can run a slider on the phone and vary the brightness of a LED on the farthest unit virtually in real time with only a tiny, fractional second delay.
 For an absolute minimal slave board you just need the radio and one of the small surface mount Arduino clones such as the one shown on the left here. We’re looking at no more than £6 plus power (5v – i.e. any old USB plug-in-the-wall supply available for less than £3) – this needs something like a relay to drive a lamp or heating – and that’s it – clearly if you want more – add more. That whole board is the size of my thumb!
And that’s it – the first fruits of this work will be to put temperature monitors and light/heat control in our rental cottage and our place in Spain so I have access to this and other information on the phone. Implementing a movement counter with a simple infra-red is another idea etc.… I need some boards first as right now this is all a bit too spaghetti.
I’m currently making mods to store in EPROM, settable remotely, the unit number from which to get the temperature for thermostatic control – and the unit which you need to talk to in order to turn the heat on by a relay. I’ve also clarified my worst fear – RF24NETWORK cannot handle sending out one communication after another while expecting to READ communications… so I’ve arranged that data is only initiated by unit 0 – which then always expects a response back. I’ve arranged a timeout for 0.2 seconds for expected data return before sending the next package out – obviously cancelling that delay when something comes in – with that in place and only with that in place I’m getting 99% reliability out of the radio packages. I’ve just added multiple retries (rarely needed) and with that I seem to be getting 100%.
And now a little history – you can stop reading now if you’re not interested but this might help to understand how I got this far… Once upon a time in the 90s, my business partner (of the time) and I developed a home control project called Appcon which consisted of a small board with various sensors and outputs – a triac (solid-state relay) to control, say lighting or heating, a temperature sensor, a general input and a speaker output. Click these pictures to see larger versions.
 This small board ran from 12 volts and connected to other boards via a 4-core telephone wire. at one end of the wire was a PC firing out commands, reading data and generally controlling the whole thing with a set of rules.
 It was developed on the original Windows 3.1 before the time of widely available Internet and LONG before we could buy cheap stuff from China.
This worked well, in my house in Newcastle I had around 40 of these cigarette-pack sized boards controlling just about everything from heating, lighting, burglar alarm, putting out “cricket” sounds in the garden, you name it.
The problem in developing this was the nature of construction – the fact that the boards had to be wired together was a real issue. In some homes it’s just not that easy to put a wire all over the place to connect everything together. It certainly is not in my stone-walled country cottage today.. I’d get shot!
The interface was good but as Windows matured it rapidly started to date and there was no such thing as a mobile phone interface! Today you would not think of using this (well, I wouldn’t!)
That product was GREAT fun and we sold quite a lot of them, but at the end of the day, home control remained a minority sport and we never did get this into the B&Qs of this world. Meanwhile, particularly in the UK, what’s out there remains expensive. Not too many people want to shell out £30-50 just to turn a light on and off!
This all sprang up from my original article on a cottage thermostat in which I envisaged a very simple controller. Then came the UberBareBoard article about an Atmega328-based Arduino clone, initial attempts to master the NRF24L01 radio and after this I wrote part 2.
Another fine day in Spain
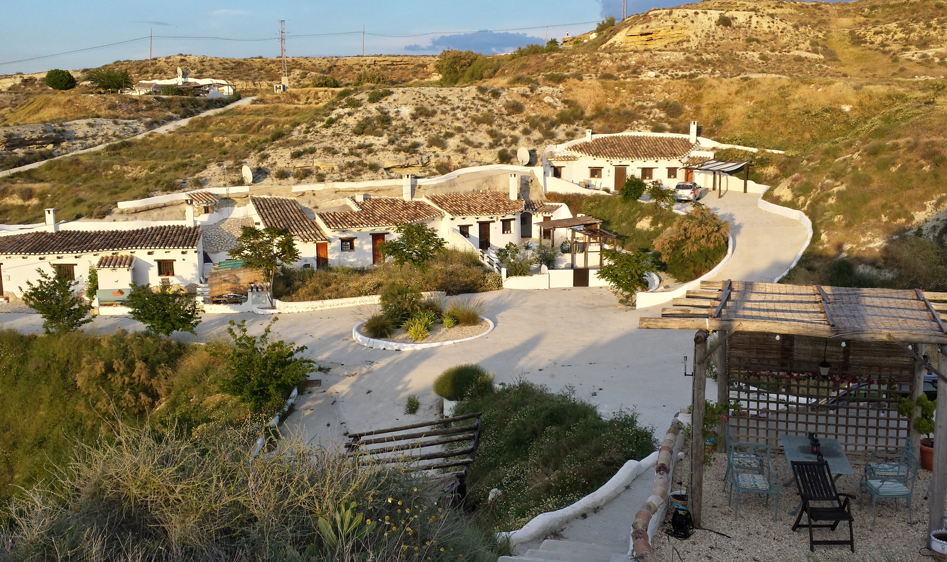
It’s certainly not peak summer weather but with the temperature topping at 25c today with clear skies for most of it, certainly a relaxing day. The solitude part (that never was) of my trip is over, tomorrow I pick up Maureen and some new gadgets (more on that later).
Today I did very little, got up late, did a load of emails, grabbed some sun, checked out the electrics but as for achieving anything… hmmm.
Tomorrow is another day, off to the airport sharpish to get a little shopping at the coast then pick up Maureen and then possibly head off to the nearest garden centre. We finish the night off with a BBQ with friends and if the weather keeps up that’ll be just marvellous.
Gutted to discover that Tesco’s new on-demand movie software seems to be able to see past a UK VPN (how DO they do that)… but I’m not really here to watch movies so that’s no big loss.
Have a great weekend, all.

The future’s not bright with THREE either
I have just had the most terrible afternoon at the hands of THREE – with what is laughingly called “Customer support”.
After having owned an iPhone 4 with THREE for two years it came time a few weeks ago to upgrade the phone. I chose the Samsung Galaxy S4.
This was promised for 26th of April as an upgrade, in writing – for no charge other than a £4.99 service charge.
Accordingly I sold my iPhone. That left me phoneless after the 29th of April. I added 3 days “just to be sure”.
I stayed in on Friday 26th of April only to discover that THREE’s supplier (Samsung) had messed up – of course that’s still THREE’s problem – they were supposed to inform customers of the delay by text. They did not inform me.
The next promise which came via their Twitter “support” was “By 3rd of May” – well, on the 3rd of May, after waiting in most of the say I sat there for hours on the phone to THREE having failed to get anywhere with their online support or Twitter. No emails, nothing.
I started the call earlier Friday afternoon on 3rd. – Around 2.50pm I started the conversation with “support” – you’ll see the number and timings below in my phone bill. Firstly they could find no record of my upgrade in their account – at which point I became less than patient as I was sitting in front of the upgrade document and delivery date with my personal details. I really wish I’d recorded the whole thing.
Then they found my account and started telling me the upgrade was £45 for the handset – I said that was NOT the case and I had my order to prove it.
Finally they said they’d upgrade the call to a higher level (THREE store support line) – and promptly put me on to the wrong people who AGAIN apologised and put me on hold.
I’d now been on the phone so long I ran out of Skype credit – and had to ring back. I got the SAME QUESTIONS ALL OVER AGAIN… at this point I asked them to upgrade the call to someone responsible – and there I sat, paying for a call to listen to music, again.
By 4.43pm I was starting to grow weary talking to the THREE Store support line. I’d been on this for around 2 hours now, at 5p per minute.
Once again they put me through to the WRONG department who were ONCE AGAIN going to put me through to the right department. More music – more cost, more time.
The new guy had my NAME down as something else…. he said I cancelled the phone – but the name he had for me was wrong… someone I’ve never heard of – we tried again…
I asked if I was on candid camera but I don’t think he’d ever heard of that… so then they found my proper account (I only have one) – 5pm – no chance of a delivery – all of this checking and getting wrong despite my postcode, date of birth, name, phone number asked for TIME and TIME AGAIN.
Next, it seemed I’d been connected to the wrong department – he put me on hold while he connected me to the “right department..”
You ready for this….
“Please listen carefully to the following details…..” _ – I’m was then told by an automated female that the home broadband system costs money to use (WHAT???) – I’m not using it… I was wondering to myself… I’m getting this message for WHAT reason? I’m on a landline number… what does this have to do with broadband??
Someone was taking the mick…surely…
and – at the end of that – the machine terminated the call.
Start again…
5.05pm – “we’re getting a lot of calls right now….” –
5.08pm – I talked to someone who then checked and… He AGREED I’ve upgraded…. agreed it should have been there 26th –then – name, date of birth, postcode. But then.. he could not find the upgrade. Maybe there was a language issue here – I certainly was not talking to anyone local. I told him again “I have the ORDER IN FRONT OF ME”.
He was going to have to talk to the online upgrade department – he could not get to my details because I upgraded online… more music at 5.12pm
5.14pm – he was going to connect me to the upgrade department. More music – same track I’d been listening to all afternoon.
5:17 “thank you for your patience – upgrades are busy at the minute… online have no idea whatsoever”. He transferred my call…. I was supposed to tell them I upgraded online – tell them to do a conference if they are going to transfer the call and not just to pass me on” – all of that went straight over the next fellow’s head.
5.19pm – “Your call is in a queue and will be answered shortly”.
5.19pm – “All our advisers are currently busy”…
5.24pm – another Indian lady wanted my postcode, date of birth, shoe size…. and then…. she could find no record of the upgrade – for the 4th time I pointed out that I was sitting in front of the order from THREE sent on 15/4/2013 – “Your ORDER” – with the details of my upgrade that should have arrived on 26/4 and then again today…
It was now 5.28pm – I was looking for email addresses of the other large phone companies so they could share a laugh… by now I was overtaken by feelings of vengeance – how can any company be so incompetent.. but it got worse…
5.33pm – Mr Scargill – please bear with me for a few moments…… it’s a different channel – we have a different stock availability to other departments – I will have a chat to my manager…… (she had the whole sordid history in front of her and did not want to transfer me again….) music…
5.38pm – music continued….I could have done with coffee but could not leave the computer or I might’ve missed a response…
5:44 – I could not quite understand what she was saying – apparently her manager said the deal had CHANGED and there’s a £49 charge for the phone… that’s not on my order, I said and it’s not what the web says either… and she wanted me to wait until Wednesday… I told them I would not pay a charge for the phone and I needed to get  one the next day as I’d be away on business all the following week. Then there I was, back on hold while she talked to her manager….or went to the toilet – or whatever excuse.
Meanwhile at Carphone Warehouse… no charges for the phone – AND a Bluetooth speaker thrown in…
5.46pm – she could send a phone out and I would get it Wednesday… or I could wait 48 hours by which point it would be a bank holiday – she did not know that – but then why would someone half way across the world know that. I imagined waiting another week…
Nothing back from the online support on Twitter and no-one was reading the Facebook site by the look of it.
5:50pm I was back listening to music while she upgraded the call – again.
6.00pm “To be honest and precise with you there is nothing I can do from my end as this is done online” – I first asked him to clarify that I was not hearing things, then tried to explain I’d been on for two hours… nothing…. … this guy was some kind of machine perhaps, unable to move out of a pre-programmed route. AFTER TWO HOURS…NOTHING – ZILCH – a man with no power to do anything.
I put the phone down rather than lose it completely – I needed coffee.
Here are the phone costs to THREE’s ABYSMAL support to achieve nothing.

Saturday morning I rang the THREE store in Gateshead and indeed the phones were in stock – they needed me to confirm that an upgrade was not already in place. I assumed after that fiasco that an upgrade WAS still in progress – after all I had the order in my hand.
I went online to cancel the upgrade… no way to do that and guess what – live support isn’t available at the weekend.
I rang the 333 number and an Indian fellow listened carefully after taking my mobile number, full name, postcode and date of birth – again. He then transferred me to an advisor (music) who then took my mobile number, full name, postcode and date of birth – again. She put me on hold while she transferred me to the correct department. When I got through and after taking my mobile number, full name, postcode and date of birth – again, they said this was the wrong department and would have to transfer me.
Finally they put me through to someone who checked my account – again and said there was no record of an upgrade in progress. I was very specific – does this mean I can go to the THREE store and simply upgrade the phone. YES SIR, he said. Of course if the PREVIOUS operator was correct, they’d have no record of my order anyway so he was probably talking tripe.
I went along to the Gateshead store who confirmed that online upgrades might be free – but THEY would have to charge me £49 for the phone. Of course I was being served by a new trainee, his only advantage over the people on the phone being a clear English voice. Well, to be fair to them, the fiasco was not THEIR fault. I took the phone and they helpfully gave me the address for complaints to write to so that I might endeavour to get the £49 and my phone bill back.
Monday 6th May I received a call from the THREE complaints centre – and received exactly the same nonsense as before, after giving my name, postcode and date of birth (remember – they rang me!!) the Indian gentleman proceeded to tell me why they could NOT help me, why they could NOT refund the money. He told me that this was because I had cancelled the online order. He seemed utterly oblivious to the fact that I’d cancelled it BECAUSE Three online could not complete the order for which they’d sent me confirmation on 15th April. I ended the call, this was pointless.
Tuesday 21st May I was sitting in Spain minding my own business when a call came in – a nice friendly lady from Scotland representing THREE. They had received my letter. She explained that she was investigating why they seemed to be unaware of my order at times – I pointed to the Facebook site – lots of people seem to have come across similar issues with bad communication from THREE. Anyway, at last the voice of reason, she’s refunding what I paid at the store plus my phone calls. My time will never be recovered but I guess that’s at least a reasonable attempt to resolve the issue – personally I’d be sacking the calls centre as well but I guess that’s a step too far. So now I have my lovely S4 phone, they did help me to get the phone working on the Home Signal box… and all’s well…
A Week in Leicester
 The highlight of the week for me has to be having met Toyah Wilcox – amazing experience. She was about to go live on stage at the FSB Annual Conference… and we met up in the holding room first for introductions. Amazingly pleasant and despite crutches due to an injury she put the effort in to give us some decent photos…
As IT Director it is my job at our conferences to ensure our presence on the web includes topical reporting, imagery, video and this year – social media.
On the social media front it is our first shot at doing this properly at one of our conferences and everything worked wonderfully well, with nice comments coming in throughout.
The delegates (several hundred) arrived on Thursday for the AGM (in which new national officers such as the chairman are elected), at Curve, Leicester (don’t ask why they don’t call it “The Curve”)followed by 2 days of debates, resolutions and exhibition.

 Friday after a very early start, I caught John Allan – the new National Chairman, in our hotel and video interviewed him on the spot – John has some strong views on out of town parking as you’ll see – the video is on the FSB website along with many other videos.
Later in the morning we had an excellent talk by Peter McAvoy of Google – I met him some months ago in Southern Ireland while at an ESBA meeting at Google’s HQ.
He talked about Google’s ideas and in particular, Google Glass which is a fascinating project about to come to fruition and involving micro-miniature circuitry effectively putting the power of a modern mobile into a set of glasses with transparent projection in front of your eyes. The video explains what they’re trying to achieve.
 The rest of Friday was taken up with various policy-related talks and we had the RT Hon Vince Cable doing his thing along with other political speakers including the RT Hon Owen Paterson.
The exhibitions included Dell and Microsoft (the latter funded the excellent Friday night drinks reception) as well as the guys from  ESBA (European Small Business Alliance) – Saturday saw more of the same culminating in the talk by Toyah Wilcox.
The whole lot is up on the web (I should add that was surrounded by an excellent team of staff and volunteers who’re working hard to make sure this all runs smoothly – but these photos are my own). Here are some more pics from the event.


Satellite Broadband
I was recently asked to trial satellite broadband by a service provider.
In some ways I’m the ideal target for this because despite living in a rural area, I have broadband already – two broadband setups in fact, one is a fully-fledged version, unlimited use but limited in speed to around 6 Mbps download and around 500Kbps upload due to simple BT line limits – that’s pretty much the best we can get out here. I’m also IT-literate so I know what to look for.
Here’s a photo of SpeedTest.net results for my normal main landline broadband.

Not stunning – but that’s rural for you! So that’s my primary landline broadband. The second is from Orange and we only keep it because it is cheap (£5 a month) – it has download limits and so is only really useful as a backup. I use a Draytek 2380 series modem that makes that switchover happen automatically.
Yesterday, the satellite installers arrived at 2pm to fit the equipment – we discussed the best place to put it (flat roof – avoiding trees) and where to put the cable. As it happens I have a hole in my office outside wall for existing cabling so it was a case of maybe 40ft of coax cable from the dish to the receiver box, tidy the cable away – plug in mains power (separate and somewhat larger than normal adaptor) to the receiver and… that was pretty much it. They installed the dish on the roof, wired it up, rang their office for activation and were on their way by 2:40pm (i.e. 40 minutes from start to finish) which is not bad! The installation looked simple enough for anyone to do – the PC showed the signal level and as they adjusted the levels, the signal went up until the point where a large tick appeared on-screen indicating data was flowing both ways (no telephone line involved here)

The dish is about twice the size of a SKY TV dish and they mounted it on the flat end of the sloping roof part of the house – it’s not really in view unless you’re a helicopter or deliberately looking up.
So now, back in my office is a black Tooway modem about the size of a normal modem – it has nothing more than power, input (from the dish) and both RJ45 and USB connectors – one of each. I guess for many people there would then be a requirement for a wireless router – as it stands this particular box feeds one computer only, hardwired. They could have supplied a standard wireless router but I didn’t need it as I already have routers and switches (a fairly complex setup) and I didn’t really want any more hardware lying around.
As it happens, the main ADSL router I use is one of the better Drayteks and has a SECOND input from any internal network source. I simply disconnected the ORANGE (RJ45) input and connected the output from the new Tooway box. As the address allocation is dynamic I didn’t have to change anything else other than telling my router to prioritise satellite only for now – for testing. In short, it worked “out of the box”.
Initial tests simply confirmed what I knew already, the PING is awful – due to the physical distance the system has to travel. One of the installers said it might be over a second but in fact it’s around 750ms (i.e. 0.75 of a second) quite consistently. One could assume that this might be an issue when using conferencing as that’s a measurable delay.. but the speed overall is an improvement on my landline broadband – tests to date are showing up to 9Mbps download (with peaks far higher than that) and around 3Mbps upload – the latter being a great improvement on my main broadband. Multiple tests show a fair bit of variation from test to test.
So how does this work in practice?

As you can see apart from PING (signal goes from here to satellite – then back down to earth, then up to the satellite then back to me) the performance compares well with plain-vanilla broadband.
The first thing that came to mind was “will this affect Skype calls?” – it would appear not, because soon after installation, I made 2 Skype video calls that were perfectly good – indeed the increased upload speed will be like a breath of fresh air for Skype (think about it – you UPLOAD your sound and video to the other guy so that’s usually a bottleneck). A third Skype call was audio only to a telephone and I thought I detected a slight delay (which makes you more likely to interrupt the other person) – but nothing I could really complain about.
How about the BBC i-Player in HD? No problem… watching the data go through the router it peaks at over 9Mbps – and the iPlayer works a treat. YouTube in HD? No problem. The iPlayer requires 3.5Mbps for HD – here’s the test run…

Downloading? A 100Meg file just took around a minute which actually beats the download speed quoted by SpeedTest.
Thinking about it, the most likely area for problems is modern high-speed network games, if someone is firing a gun at you, not finding out for nearly a second is likely to be an issue!! My grandson spent the afternoon on another machine playing World of Warcraft and never even noticed the switchover!
VPNs? Some folk use VPNs to access work data or perhaps to watch TV in foreign country… I’ve tested several and they all work well. Again I would expect this to compound delays but up to now that’s not really been noticeable.
Remote cameras? Noticeably slower to administer, no doubt due to the simple coding inside them and the likelihood of very small packages going back and forth. I’d say interacting with them is 3-4 times slower than normal broadband. Speed of actually capturing frames seems unaffected.
Facebook, again probably because of large numbers of small packages of data going back and forth, runs more slowly than usual and seems the most affected up to now, but it’s still quite useable.
For me, at this point, the satellite installation generally works fine other than the slight delays. I would not wish to give up the landline but if I had no alternatives I’d be happy and the HD streaming ability is handy. I’ll put more information in here as I gain experience – I don’t know yet if I have a fixed IP address or not on this new service – I’m assuming I do (that might be important for, for example accessing information remotely). If the price is right this could be a good product.
NRF24L01 Transceiver and Arduino
This one’s for techies only! The NRF24L01 2.4Ghz transceiver.
So you have your Arduino (single-chip micro with bootloader) or similar (could be a PIC project really but you’d have to understand and re-hash the libraries) up and running and you need two of them to communicate. How do you do it?
One way is the excellent EASYTRANSFER library (just look up ARDUINO EASY TRANSFER) which among other things lets you define 2 wires for serial communication.. the library can let you transfer arbitrary blocks of data back and forth reliably and at speed, but placing that cable can be a pain depending on location and/or the patience of your spouse.
 If you need wireless communication at low cost, then perhaps the NRF24L01 modules are for you. I must stress that the really cheap units with PCB aerials do not have a lot of range (ignore the crap people put in print about range – such comments are about as reliable as the ads that claim 96 hours standby on your smartphone – yeah, right).
The problem I found is that there is SO much incorrect or contradictory information out there I decided to write my own blog on the subject. As I sit here, I have two dissimilar Arduinos (one is a NANO, the other is simply built from scratch on a breadboard, both use the 328 chip, a marvellous if limited device that costs just a few ££s) and I have the two passing messages across to each other reliably – when I say reliably, we’re talking about radio but what I mean is that only accurate information is being sent – you can rely on it within the limits of range of the devices (and the weather and walls and WIFI signals etc.).
Often when radio people write such stuff you get how to send a character across and the rest is left to you on the assumption you know your stuff – well we’re all beginners at SOME point. What I’ll describe here is sending an arbitrary BLOCK OF DATA across – that data can be whatever you want but let’s say a character string like “Hello world” or an integer containing the time – or both.. you might want a wireless display board or weather station etc.… who knows – this will let you send whatever you need to send back and forth.
So, do you need wireless transfer and you’re happy with maybe 20-30ft with no walls or maybe the next room? This article is for you (and if not you might be looking at the same thing with and external aerial so this article is STILL for you).
 So firstly lets take a look at the radio hardware. The NRF24L01 radios comprise a unit smaller than your average thumb with either an 8-way or 10 way connection depending on which module you go for – makes no difference, you need in total 7 wires to do the job including power and ground.
The connection details are here and you need the RF24 library – rename it simply to RF24 so the Arduino IDE doesn’t kick up a fuss. There are a couple of variations of this library – mostly unfinished – it’s a shame people take all the time to make a library – put it out there – admit the library has a long way to go – and then forget about it! An example is the RF24SH library – “needs work” – and no updates for a year! What!!?
Gregg Copeland has done mods to the RF24 library but the one I’d check out now is here. He has also done mods to the RF24NETWORK library. http://tmrh20.blogspot.co.uk/2014/03/high-speed-data-transfers-and-wireless.html
First thing to note – these unit run on 3.3 volts – and will EXPLODE (slight exaggeration, more like smell for a while then pack in) on 5v so don’t even think about it. One of them is running on the 3.3v output from the NANO, for the other I simply dropped the 5v supply through 2 4001 diodes – that’s it – you don’t have to worry about the data lines, just don’t feed 5v into the power lead. On reflection (August 2014) the diode dropper wasn’t a good idea – and I’ve recently learned about all sorts of issues with current spikes on these radios so I consider it a MUST to attach a capacitor across the power lines ON the board, a 6.3v 330u cap works for me. Without this expect all manner of strange issues of range.
Using the library I mentioned above (you need the RF24, NOT the MIRF library from that website) you’ll find an example of how to send the time from one board to the other wirelessly… but that leaves SO many questions including how much RAM does this use etc.. well, here are some quick wins for you. The library uses only something like 16 bytes and the chip will retry messages 15 times – if you want more data it’s over to your code. The chip will send and receive it’s own buffer of up to 32 bytes… that is – your code can be doing something else while it’s buffering up 32 characters. Great!
Of course you need to store the data somewhere – if you’re sending you need to store the output buffer, if you’re receiving you need to store the input buffer and in their time example the same code handles both transmitter and receiver, using an Arduino pin to select what job the board is doing (GREAT way to knock up a test). So – I decided to allocate 64 bytes of RAM to this in total – 32 in one direction, 32 in the other. I knew I wanted various types of data so I created a simple STRUCT…
union radpack
{
byte package[32];
int myints[16];
float myfloats[8];
};
radpack radio_in;
radpack radio_out;
So what’s a UNION – you don’t see much about these but they’re dead handy.. a UNION is a block of memory and it’s size is dictated by the largest item in it – they overlap so you can’t use them at the same time – but for a buffer they’re ideal as you don’t then have to do all sorts of conversions depending on the data you need. I could have just used a struct but in this case I wanted to experiment sending different types of data at different times.
In this case, if I wanted to populate RADIO_OUT
buffer with text I might simply do this…
strcpy((char *)radio_out.package,"Peter calling breadboard.......");
So, look at the example in the RF24 library which lets you bounce the time back and forward between two modules – and then instead of sending the time – send this data… if you look at the library example you’ll see where this belongs…
bool ok = radio.write( &radio_out, 32);
You’re sending the address of the union (block of data) and it’s size (32 bytes in this case – note the reference to 32 above – that tells radio.write how much data I’m sending – and remember the chip’s internal buffer will handle no more than 32 bytes at once – if you want more, send more than once package one after the other – but remember you’ll have to buffer that too and the Arduino with 328 only has 1K of RAM IN TOTAL). You could send less if you don’t need that much but I figured as the chip is capable of processing 32 bytes and I needed to send text – why not. It might be that I’d want to send a bunch of integers …. same send code but populating as:
radio_out.myints[0]=456;
radio_out.myints[1]=500;
radio_out.myints[2]=1;
// OR…
radio_out.myfloats[0]=56.45;
radio_out.myfloats[1]=567.9;
// etc
In the note above I’m referring to the UNION – don’t use all it’s innards at the same time as they overlap each other and are merely a convenience for you.
So assuming you got the demo running sending time back and forth, now you have the information to send arbitrary data up to 32 bytes at a time – you might use that to make a wireless message board using a 16 character by 2 line display (but remember- there’s a zero on the end of C strings so you’d only be able to send a pair of 15 byte messages unless you then later added a zero in your own buffer).
Update August 2014: Elsewhere you’ll find information on the RF24NETWORK – this works well but has a strange numbering system – an alternative is the RADIOHEAD network – but beware – the latter has a full mesh network option – tried that – had varying results until I realised that the NRF24L01 chips do not have any means of detecting signal strength – which begs the question – how does the network know how to pick the strongest signals! I went for the intermediate option with that library and defined the nodes and their connections manually. At the time of writing I’m still having reliability problems with the large (NRF24L01+PA) radio modules but the little cheap ones work just fine.
I did a short video on this showing this in action at the end..
This article is part of a chain or articles which started back early 2012 with my cottage thermostat article. How things change. This was followed up by the original UberBareBoard article detailing a 328-based Arduino clone. The next article after this is called home control over the Internet.
New pics of grandkids
See grandkids page. New pics.